When was the last time you cleaned your devices? And I don’t mean randomly wiping down the surfaces with a shirt to remove a smudge or dust particle. I mean really scrubbing away those fossilized fingerprints off your keyboard and screens, clearing caches, cookies, logs, and browser histories to speed up your processing power.

Yes, when was the last time you were that thorough with your device cleaning? Chances are the answer is “rarely” - if ever.
In all seriousness, you should have a cleaning session like this once a month. If you’re too busy, try baby steps at first… maybe every three or six months until it becomes a habit for you.
Most users spend an average of 13 minutes daily, waiting for their devices to catch up. And according to an Intel-sponsored interactive study, 80 percent of adults get frustrated while waiting for their devices to load.
Why You Need to Clean Your Device
For starters, regularly cleaning your devices makes your computer aesthetically pleasing, allows it to run smoother, and extends its lifespan (insert mic-drop here). The dust and unwanted particles that build up over time can suffocate your PC’s hardware if left unattended for long. By staying up to date on your cleaning, you can save money and time by protecting your device and reducing its chances of breaking down. 10347010
The same applies to your smartphones and tablets, too.
Now that you’ve accepted that your device needs cleaning, here’s what you’ll need:
- Cleaning cloths (preferably microfiber)
- Q-tips
- A compressed air can or small fan
- Isopropyl alcohol (70 percent)
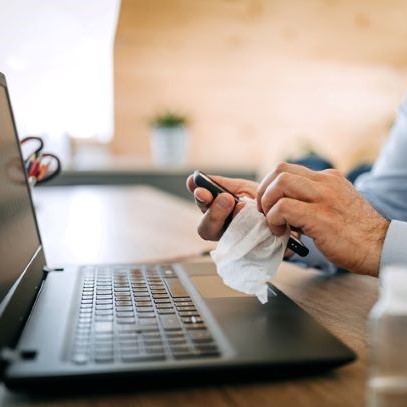
Step One: External Cleaning
Before going any further, ensure that your device is turned off and unplugged from the power source. If you ignore this process, you could end up doing more damage than good to your computer’s hardware.
The Screen
Use the dry microfiber cloth to dust the screen and surfaces before dampening it. Distilled or filtered water works best here since it’ll allow you to avoid streaks on your screen. If you prefer using cleaning fluid, ask a tech expert for one that’s designed specifically for your device.
Ensure the cloth isn’t soaked in water – it shouldn’t have droplets falling from it. Use the damp material to wipe away smudges from both the front and back of your device. While scrubbing, make sure you go from corner to corner and avoid getting any liquid into the computer’s ports.
The Keyboard
 If you’re fond of eating while using your computer, the chances of having crumbs between or inside your keys are high. You need to get them out before using a damp cloth to clean the keypad. Use a small fan or a can of compressed air to clear out the tiny particles.
If you don’t have any of the mentioned items, you could always resort to blowing out the crumbs with air from your mouth. It might take longer, but in the end, you’ll get the same results. Take your clean cloth and Q-tip, and run them over the keys until they’re shiny and clean. Dampen the Q-tip with isopropyl alcohol for an even better result.
The Mouse
If you’re using an external mouse, it might require cleaning too. The optical ones that use light to determine the surface area don’t need internal cleaning. Focus mostly on cleaning the outside with your damp cloth.
A mechanical mouse, on the other hand, is more susceptible to dust particles getting lodged in small openings. Unplug the device from your computer and remove the batteries inside. Wipe the outside of the mouse with a clean microfiber cloth dampened with a little bit of alcohol.
Move the mouse on a piece of paper to dislodge some of the dust inside it. If that doesn’t do the trick, turn it over and rotate the ball in a counter-clockwise method to get it out. Use your damp rag to clean both the inside of the mouse and the ball before reassembling the pieces.
Going A Step Further
If you feel you can handle it, consider opening your computer’s outer case with a screwdriver. Use compressed air to blow dust buildup in the vents, fans, and other accessories away. Replace the case and use Q-tips to pick up lingering dirt on the surface of the device.
Check your computer’s manual for safe case opening and cleaning instructions before proceeding to take it apart. If you can’t do it, leave the work to a professional or someone with more experience. You can save this extra step for every three to six months.
Step Two: Internal Cleaning
 This process is just as crucial as the external maintenance – maybe more. Your computer may contain more junk than you know.
Plug your device in and power it up before proceeding to do the real work. You can identify files or folders you no longer need from the Settings app where you can proceed to delete them. Locate applications you never use and get rid of them.
The Disk Cleanup utility allows you to erase temporary system files and improve your computer’s speed in the process. Go to all your web browsers and delete the history section to free up megabytes worth of space.
You might have to reload several files and images the next time you browse, but it’s a small price to pay for the optimum performance you need.
Back up vital documents and files on an external hard-drive or the Cloud.
If you don’t know the ins and outs of computer systems, consider approaching a professional for assistance. Ask them for the specific cleanup tools for your device that would help you handle the software maintenance process best. Get a good antivirus to protect your computer from malware and bugs. Windows, Apple, and Mac have unique sets of tools that help devices to run smoothly and efficiently.
iPhone and iPad users can go to their iTunes preferences and click on ‘Devices’ to delete backups for old devices they don’t use anymore.
Finally, clear out your junk files and empty the recycle bin before finally rebooting your device.
Do What’s Best for your Device
Save yourself the stress, time, and money it’ll take to fix your computer or phone from breaking down due to lack of proper care. Use GVTC’s reliable internet service to gain quick access to the resources you need to to stay on top of your electronic devices.