The GVTC Elevate remote enhances how and when to enjoy your favorite TV shows.
Who doesn't like to watch movies at a time that suits them? So, even if you are busy, you can record your dearest shows for later.
In this guide, you'll learn how to make the most of your GVTC Elevate remote.
 An Overview of GVTC Elevate Remote
The GVTC Elevate Remote is one of GVTC's remote control devices. GVTC Elevate lets you access your apps and live TV in one place.
Every user can record 5 programs at a go. Record up to 350 hours, and get it stored on 11T of a hard drive.
Let's talk about how to do this effectively.
Features of the Remote
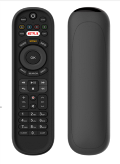
First, you need to familiarize yourself with some of the buttons on the remote. For this guide which is how to use the GVTC elevate remote for recording Netflix and Pandora, we will focus on the following buttons:
- Netflix to gain access to all the features on Netflix
- Menu to display the main cable menu
- Live to return to Live TV
- R to record
- Guide to return to the program guide
Programming Your Remote
- Let's assume you just get the remote. How do you get it ready for use? Insert two AA batteries in the battery compartment of the remote control. Ensure that the negative (-) and positive (+) terminals of the batteries are attached to their appropriate ends in the compartment
- Press and hold the OK and Mute buttons until the power key blinks twice.
- Once you see the blink, press the
- Yellow A button for TV
- Or Blue B button for the Audio device
- The Power button should stay lit when you've completed these steps.
- Find your device and brand on the charts with its corresponding product code. Notice the number on each brand or appliance. Then, press and hold the digit on the remote control.
Alternatively, to program your remote, do these:
- Once you have the battery installed, press the Yellow A button
- Now press the OK and Mute buttons until you notice the key blink twice.
- Enter the first TV code for your TV brand from the code list.
- Press the Power button to test with your equipment.
- If the device turns off, you have completed the setup.
If the device doesn't turn off after the steps above, use this third method:
- Press the blue B button
- Press and hold OK and Mute until the Power button blinks twice.
- Enter the first code for your brand from the code list and press the corresponding digit.
- Now, press the Power button to test with your device. If the device turns off, the setup is complete.
- If the device doesn't turn off, repeat the setup steps using the next code for your brand.
Using the Remote for Netflix
You must have noticed the Netflix sign on the remote. This key will open the TV to use Netflix.
However, you have to customize the menu to have the Netflix feature. If you have done this step already, you can skip to the next section.
Using the Branded Remote to Customize Your Menu
- Press the Netflix button on the remote
- Select sign in
- Sign in if you have a membership plan. If you don't, you have to buy one.
- Select continue
- Your device is ready for use.
- You can access the Netflix menu anytime with the Netflix button on the remote.
Alternatively, connect from the home menu with these steps:
- Select the menu on the remote.
- Select Apps from the options.
- Press OK.
- Select Netflix.
- Sign in with your details.
- Your device is ready for use after that. Simply navigate around and use the program as you wish.
Using the Remote for Pandora
When you click App on the User interface of the TV, you will have access to many other available apps.
- Select Pandora
- To get started, you'll need to sign in to your account if you haven't.
- Listen to the music of your choice.
 The Recording Feature
To begin, you need to familiarize yourself with the recorded TV layout.
- Click on the Main Menu and scroll down till your focus is on a section labeled Recorded TV.
- You will find programs you have recorded or currently recording in alphabetical order.
- Episodes of a series are grouped into folders.
- Once you are focused on the folder, you'll see the individual episodes in the preview panel to the right.
- To watch a show, select it, and press OK.
- If you've already watched part of the show, you can choose to resume or start over.
What Are the Recording Options?
These are the options available to you when you select a program to record.
Press the info when a recorded program is in focus. A list of options will become available to you. They include:
- Play or Start Over: Launches the program full screen from the beginning.
- Resume: this option only appears if you've watched a portion of the program and will launch the program full screen from the point you left off.
- See all times: it displays all of the times that particular show airs.
- Delete: it removes the program from Recorded TV.
- Recording options: this option lets you access the recording options menu.
- Keep Until: Your media player will automatically delete the oldest shows in your Recorded TV folder as you need the room for new recordings. Keep Until lets you set the program to be deleted at the point of your choosing.
- Lock: Prevents someone from watching the recorded program without a PIN.
- Record Series: You'll get this option if you only have a single episode recorded.
Folder Options
If you bring a folder of episodes into focus and press OK, you'll see the following options:
- see all times
- record series
- lock
- Delete all
What's the Scheduler and How Do You Use It?
Under the Recorded TV, you will find the Scheduler.
The Scheduler shows the recording space status.
With the Recorded TV Scheduler card in focus, click OK, then scroll right or left using the remote control. This allows you to view:
- Scheduled Shows (scheduled for recording)
- Scheduled Series (scheduled for recording)
- Deleted (recordings you have deleted)
- Canceled (scheduled recordings you canceled)
- Recording Space (remaining)
- Recording Defaults
Scheduled to Record
You can confirm that a show is set to record by selecting Scheduled Shows or Scheduled Series. You can also cancel a recording and access your recording options for each show. Finally, pick the show you want to manage and press info on your remote control.
Familiarize Yourself With Recording Icons
- A red color circle at the side of a highlighted show means it's recording at the moment.
- A grey colored circle with a black sector shows that the recording has been scheduled.
- A brown colored circle (with a warning symbol) indicates that a recorded show can be deleted if some space is needed for new recordings.
- A green rectangle indicates that a recorded show can only be deleted manually, unlike the w.
FAQ
Let's take some frequently asked questions.
How do I sort programs?
You can sort programs under the scheduler. Check the above to find how to locate this.
Scroll down and select the Sort Options card to sort your recorded TV shows by program title or date. You can also choose whether recordings appear in ascending or descending order.
I only have the GVTC service, but I can't see Netflix, YouTube, or Pandora apps.
The services mentioned are integrated into the GVTC Elevate apps with an internet connection. First, you have to connect your GVTC TV to the internet.
Then revisit the section under “programming your remote” to see how you can seamlessly use Netflix, YouTube, or Pandora.
Can I program my soundbar and surround sound system to the new Netflix remote?
Yes, you can. Please, follow this step to set volume controls.
After programming your remote, press and hold OK and MUTE until the Power Key blinks twice. Then press Volume + Key that corresponds with your device. Next, press the Yellow A for TV or the Blue B for Audio devices. That should set the volume.